Prepare Arduino IDE for ESP8266§
The Arduino Integrated Development Environment (IDE) is the tool you will use to program the ESP8266. IDEs are more than just editors; they help you with various tasks during the development process.
To install the Arduino IDE go to https://www.arduino.cc/en/Main/Software and download the latest version for your operating system:
- For macOS you can download a ZIP file which you then have to extract.Take the extracted application “Arduino” and move it to your 'Applications' folder.
- For Windows you have the option between an executable installer and a ZIP file.The ZIP file might be the better option if you do not have administrator permissions on your system. The installer on the other hand can put the libraries in the proper places.
Now you have a bare Arduino IDE which brings everything needed to write programs for the standard Arduino ATmega chips. But we want to write and compile code for the ESP8266.
Install the ESP8266 toolchain§
A tool chain is the set of tools that lets you compile and create binaries for a certain platform. Since we want to create binaries for the ESP8266 we need a different tool chain than the one that comes with the plain vanilla Arduino IDE. One of its wonderful feature is the Board Manager. It lets you install support for many different chips and boards with just a few clicks.
- In the Arduino IDE open the preferences/settings and enter http://arduino.esp8266.com/stable/package_esp8266com_index.json into the text box Additional Board Manager URLs.
- Now go to Tools > Board: ... > Boards Manager..., search for the "ESP8266" board and click Install. Note: ThingPulse does not recommended to install beta or RC versions.
- Take a break until the installer finishes.
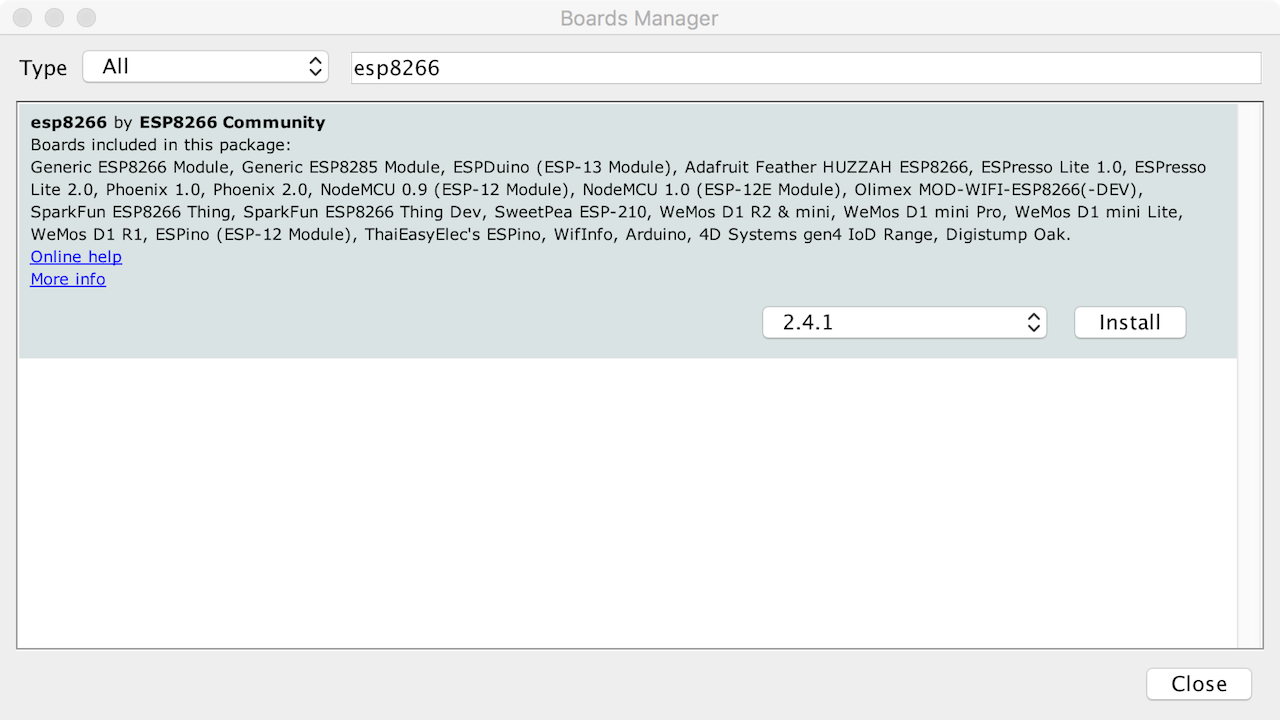
From time to time you want to come back to the Board Manager and make sure that you have the latest non-beta non-RC version of the ESP8266 tool chain installed. To do that simply click on the ESP8266 entry and select the latest version from the dropdown. Then hit Update.
Select board and serial port§
The Arduino IDE knowing about ESP8266 modules in general is not enough as they are not all the same. There are subtle
but important differences as for available flash memory and how they can be programmed. The selection of the correct
board also defines the names of the GPIO pins. The designers of the NodeMCU module for example decided to introduce a
completely new naming scheme for the pins. Instead of calling them GPIO1, GPIO2, etc. they relabeled them and
prefixed each one with “D”. D0 is GPIO16, D1 is GPIO5 and so on. By selecting a specific board in the Arduino IDE
you automatically have the correct naming scheme and other relevant parameters available,. This helps a lot as for
the NodeMCU modules for example those names are also printed on the PCB.
Not all ThingPulse kits come with the same ESP8266 chips/modules. We carefully selected the best option for each kit. It's essential that you know which module you get with a specific kit so you can configure Arduino IDE correctly
- Starter Kit → NodeMCU 1.0 aka v2
- Color Display Kit → LOLIN(WEMOS) D1 R2 & mini
- ESPaper Kits → Generic ESP8266
In the Arduino IDE do as follows:
Tools > Board: * > select as per the above list
In an earlier step you installed drivers for the USB-to-Serial converter. If everything went well and the device is
plugged into your computer you should now be able to select the serial connection. It should show up in the Menu
under Tools > Port. On macOS the serial devices are called /dev/cu.xxx. On a PC it should be listed
as a COM port labelled COM# (where # is some number).
If you cannot see your device in the port list, try to unplug it and re-plug it after a few seconds. Also try a different USB socket. If that does not help try restarting your computer and/or try with a different USB cable.
Warning
Depending on what you had previously been working with in the Arduino IDE you need to adjust the UART baud rate. Tools > Upload Speed should be at least 115200. Depending on host OS and driver you can go all the way up to 921600. You need to experiment with this setting a bit; higher is better of course.